Showing posts with label chair. Show all posts
Tuesday, January 29, 2019
Mini Making Me
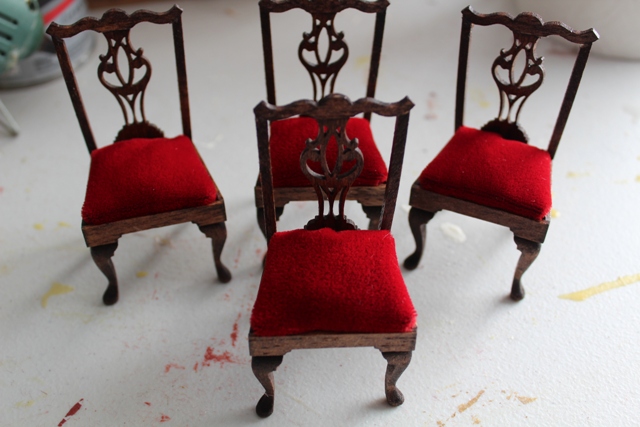
After finishing the dining room furniture I decided to complete the kits I purchased from Kris at 1 inch minis - Estate Chair. Her directions were well written and it was easy enough to put the chair together, although I did manage to get glue in places where glue shouldn't be. I guess that's my trademark . . . sigh . . .
Saturday, January 26, 2019
Dining Room Suite
Yesterday I finished the dining room suite. It went together fairly well, except for the breakfront upper doors. They were a pain. Every time I tried to install them with the pins, they'd break apart. Grrr . . . I managed to get it all together, however, and I'm pleased with the results. Except for the stain. It's rather disappointing. I purchased Minwax Red Mahogany, but honestly it looks just like the dark walnut I've been using. I like darker furniture so it's not a total bust, but I was looking for the mahogany color of Chippendale furniture. Oh well . . . I'll just have to say it's American Chippendale, as they used various other woods other than mahogany.
The other disappointing feature is that when I pulled off the plastic protecting the "glass" inserts, it left marks. I guess because the kit was so old it had settled somewhat. I'm hoping a little bit of "Goof Off" will work. Do you have any other suggestions?
On the whole I enjoyed building my own furniture. I still have two more chairs to build and upholster, so I had better. Not to mention the kitchen . . .
The other disappointing feature is that when I pulled off the plastic protecting the "glass" inserts, it left marks. I guess because the kit was so old it had settled somewhat. I'm hoping a little bit of "Goof Off" will work. Do you have any other suggestions?
On the whole I enjoyed building my own furniture. I still have two more chairs to build and upholster, so I had better. Not to mention the kitchen . . .
Wednesday, January 23, 2019
House of Miniatures
The interior of the manor is finished. Let me say that again . . . the interior is finished! Save for a few pieces of crown molding in the 2nd floor hall and adding trim around the parlor bay window. I saw how Mike Guidry had done it in his Beacon Hill and decided I liked it. So I'm going to do it.
Since the interior is complete I decided to pull out my House of Miniatures kits yesterday. I've been procrastinating on getting these done because I thought they'd be difficult. To my delight and surprise, they weren't difficult at all! I guess because a couple of the boxes weren't sealed, I was worried that pieces were missing, but my worry was misplaced. All the pieces were there. Big sigh of relief . . .
I purchased all Chippendale furniture (story to follow in another post). I started with the dining room table. It went together without too much effort. I just couldn't figure out how to place the blocks on the side aprons, but once I figured that out, I was done. And I had to re-glue the tops to the under carriage and place them under some heavy books because the tops had lifted off. Disaster averted.
Since the interior is complete I decided to pull out my House of Miniatures kits yesterday. I've been procrastinating on getting these done because I thought they'd be difficult. To my delight and surprise, they weren't difficult at all! I guess because a couple of the boxes weren't sealed, I was worried that pieces were missing, but my worry was misplaced. All the pieces were there. Big sigh of relief . . .
| Table ends and table leaf. |
| Underneath shows the sliding mechanism. |
Call me crazy, but this picture makes me laugh hysterically. It looks like a flattened chicken. Disclaimer: No chickens were harmed in the making of this table.
Next I built the chairs. I was going to just do a pair and call it a night, but I got addicted. I have that type of personality . . .
| I used push pins to hold the back in place over the alignment diagram. |
Oh my gosh I love miniature furniture! Isn't it the cutest? And I have to say that building my own comes with a great sense of satisfaction and accomplishment.
Next I decided to "just" open up the breakfront box and check to make sure all the pieces were there. Well, one thing led to another and . . .
Today I'm going to finish building the breakfront and then I'll seal, stain and varnish everything, along with making the cushions for the chairs. And just because I like to play . . .
Subscribe to:
Posts (Atom)