Showing posts with label windows. Show all posts

Wednesday, September 26, 2018

Window Woes

So I completed the bay windows only to discover that I painted them wrong!  After looking longingly at my inspiration picture, I realized I didn't paint the exterior window sashes in the right color.  Only the inner exterior trim.  Whaaaaa . . . .  I gently pried the windows apart and repainted them in the gold they should have been painted in the first place.  Satisfied that I got it right, I set about gluing and reinserting them.  Then I discovered another faux paus!  I painted the interior sashes cream instead of staining them!  Sigh . . . I feel defeated.  My only recourse now is to paint them as close to the stain color as I can.  As a sometime perfectionist, this irks me, but I'll have to live with it.  Needless to say, I was much more careful with the remaining windows.


I'm loving this little breakfast room addition!
Yesterday, I sanded, painted and stained the double bedroom window, the third floor hall window and the two dining room windows.  They turned out well, but I noticed this morning that one of the dining room windows is crooked.  EEEgads!!  I tried to pry it off, but I glued it on so well it isn't budging and rather than create a real mess, I decided to leave well enough alone.  This window will be covered by the screened porch, so I'm hoping it won't detract from the overall appearance of the manor.


However, if I loose sleep over it tonight, it might be coming off anyway . . .  Question:  Why is it that when you dry fit everything fits perfectly, and then when you glue it things turn out wonky?  Enquiring minds want to know!

I also cut out the opening for a single French door from the bedroom to the deck over the breakfast room.  I had originally ordered a full glass door, but then I thought "why'd I do that?" when clearly it should be a single French door!  Ah well, all's well that end's well.

I centered the door over the breakfast room's bay windows.  I had to pull out hubby's big saw to cut through the plywood and then finished the little bits with my utility knife.


Then I found a piece of scrap wood to fill in the space left by the original window opening.  And voila!  An opening for a French door (to be installed upon arrival).

I'm working on the ceilings now getting ready for lighting this weekend when my friend arrives to help me out.  I'm not only looking forward to lighting the manor, but spending time with my friend whom I haven't seen in several years.  It will be fun catching up!

Wednesday, September 12, 2018

Easy Does It

Well I'm nearing the end of the major part of the build on the manor.  Next up is trim, siding, and painting on the exterior.  On the interior, I'm set to do the wiring and lighting with a friend of mine near the end of the month.  All the lights have been ordered except for the chandeliers.  They may have to wait while I save my pennies.


I spent some time yesterday inserting 1/4 inch foam board on walls where there are doors and purchased windows.  Since the dollhouse walls are only 1/8 inch thick and the doors are 3/8 I had to make up the difference so that the door molding will sit right on the door.  The foam board will be glued in place once the wiring is done.  After that I can finish the wallpapering.

Speaking of wallpapering, the breakfast room has taken on a life of its own.  As I was working on getting the doors in, it told me it wanted to be yellow.  Yellow is not one of my favorite colors, but who am I to argue when a room tells me what it wants to be?  I found some pretty yellow paper with a lovely ceiling medallion to match.  The only problem is the medallion is larger than my small room, so I'll be cutting it to fit hoping the cuts won't be too noticeable.  I also found some sweet little yellow brocade chairs and a painting with spots of yellow in it.  This room is coming together all on its own!


I'm making progress on the main hall flooring, but I ran out of border so Brian has to print more pages for me.  I should be able to finish that up in an hour or so.  It took me awhile to figure out how to cut the angles (and there are plenty of them!) but once I figured it out it took no time at all to put it together.  I'll finish it up with a coat or two of super gloss Mod Podge.


The basement has been in limbo since I'm waiting on the door for between the kitchen and the butler's pantry.  I also don't want to wallpaper these rooms until the wiring is in for the lighting.  I did get the staircase stained though.  I also had to add a little block of wood at the bottom of the newel post at the bottom of the staircase because it was just a little short.  Sometimes these little annoyances can work out well because I like the added detail!  I'm still bothered by that staircase to nowhere, so I might create a faux opening . . .


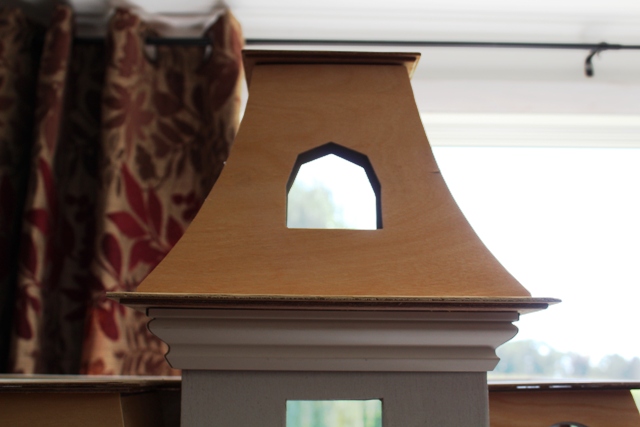
And speaking of annoyances . . . the turet at the top of the tower is supposed to be held in place by 8 little tabs, none of which line up.  I trimmed until I was blue in the face and still didn't get it to line up.  Also that turet sits pretty precariously on that tower so I came up with another solution.  I cut (or rather Brian cut because I couldn't for the life of me get the crown molding to line up at the corners properly) four pieces of 1 1/2 inch crown molding to make a square under the turet, glued them in place and slipped the turet over the tower walls.  It's perfect!  No more worrying about that turet falling on my head.


Today I start on the windows.  If you don't hear from me for a while, send the paramedics.  I'm likely buried under heaps of sanding dust!